Tuesday, August 16, 2011

Tot School- yogurt and blocks

     Little Man (17 months) is really into putting things in containers or bottles so I made him this little work.  I took an empty yogurt container and cut some holes into the top.  The blocks I got at Target in the $1 section this month.  Once I introduced this work to Little Man, he didn't put it down for almost 45 minutes.  I have a feeling he would have kept working but it was time for bed. 


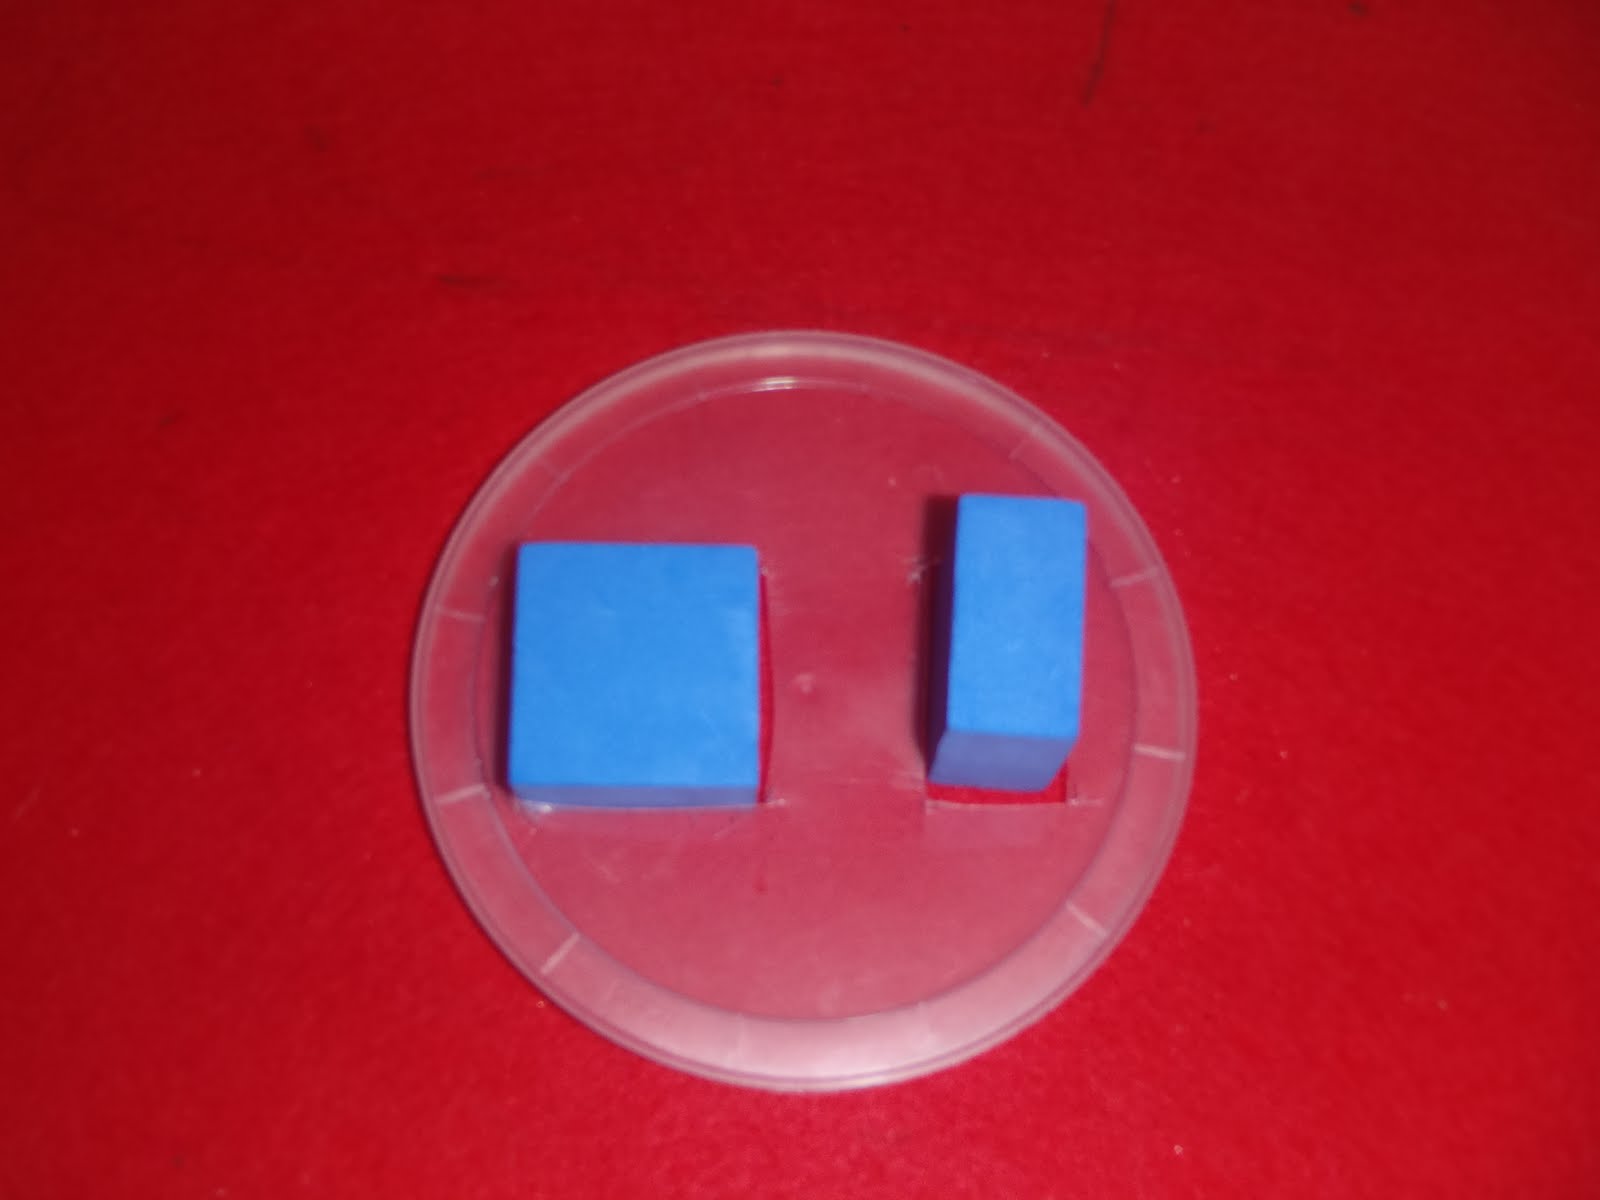
     I cut out holes the shape of the cubes.  The hole on the left will allow the cubes to go in any way but the one on the right only lets the cube go in one way.  Little Man does a great job with the one on the left but the one on the right took him some time to figure it out.


     Towards the end of working with this Little Man figured out how to take the lid off and get the cubes out.  Now, putting the lid back on is another story.   

Saturday, August 13, 2011

Tot School- Stacking pegs

     Little Man (17 months) and Sugar Bear love these pegs.  At first Little Man struggled to put the pegs together but he now has the hang of it.  Both really like to stack the pegs on top of each other verses putting them in the board.  For now I have just been letting him learn to stack them together.  I plan on later doing more color sorting. 


Wednesday, August 3, 2011

Calendar Time

      I think I have finally finished our calendar board.  Here is the finished board that is hanging in our "school" room.


     From Left side to Right side: Monthly calendar located under the monthly calendar we will be doing yesterday was, today is, and tomorrow will be with the orange cards in the pockets also we will be putting the weather card on the pocket for each day for a week.  On the right hand side, we have our weather bear and under him is our season.


     For now we will be using just one type of shape for the calendar numbers.  The plan is to introduce patterns at a later date by adding additional shapes and colors thus making the patterns (AB, AAB, ABB, AABB, ABC, etc).


     Here is a closer look at my pockets I made out of paper.  The pockets match up with the calendar days too.  I like the idea but wished I would have made the pockets taller so I could have put the names of the days of week under the cards that say yesterday was, today is, and tomorrow will be.  I might change it if it bothers me enough.  I like the weather cards on the pocket.


     Our weather bear!  We will be changing his clothes and adding different weather pieces as the weather changes.  Its been really hot here so we haven't had to change his clothes yet.  I still need to make some more clothes but I am ready for rain:)


     Season card.  I made this out of foam board and scrapbooking stickers.  I will make the other seasons the same way.  I'm pretty happy with how this turned out.  As time goes on I will add another foam board to show what the trees do for each season but for now it looks good.


Tuesday, August 2, 2011

August Sensory Tub- Ocean theme

     For the month of August we are doing an Ocean theme and like I promised here is our sensory tub for the month of August. 


The blue bowl I found at Dollar Tree and the blue rock is aquarium rock from Walmart.  Just an FYI the blue comes off on little hands so be careful to not get it on walls.  The blue does wash right off.  There also is a small pouring glass and a flat tip spoon.


What animals are inside the sensory tub: fish, octopus, hammerhead shark, stingray, starfish, eel, lobster, crab, turtle, dolphin, whale, jellyfish and a home made mermaid.

Toy Tuesday- Felt Board

      Recently, my father and I painted Sugar Bear's room and it got me thinking about putting up a chalk board for her.  As I thought about what that would involve I remembered I had an old felt board made from the time I was student teaching.  I thought that would be great for her room!!!  Once I decided on the felt board I began thinking about making new pieces for the board.  I wanted to make pieces she would like to play with and won't cost me an arm and a leg.  I looked around my house and found some iron-on transfer paper that I was going to use to make some t-shirts and I thought why not try to make my own pieces. 

     What I found by doing this process is that finding the images to use was the hardest part.  The pictures may look good when you save them but they don't always look good when you make them bigger.  After some searching I found my first set of pictures...Disney princesses.  Sugar Bear loves her princesses.  So, I printed the pictures onto the transfer paper and began the process of ironing them on (followed the instructions that came with the iron-ons).  The first batch of felt pieces was made on single sheet felt that you get from Michaels.  I really had no issues with the felt itself because the paper was the same size as the felt.  What I did notice if I didn't leave the iron on a picture long enough the picture had some cracks in it.  If you look at Cinderella you will see what I mean.  Belle came out great!!

     My next to sets I used a yard size piece of felt that you find at Michaels.  I found when your iron moved off the paper and touched the felt, the felt melted and stuck to the iron.  Once I figured that out I was really careful to stay on the paper.  Also, when positioning your pictures on the paper make sure you leave a gap between the edge of the paper and the picture.  The pictures that where to close to the edge did not transfer well.  The edges near the side of the paper did not stick no matter how long I left the iron on them.
    

My Little Pony


Phineas and Ferb (minus Ferb see placing picture to close to the edge)

     For now the felt board lives in Sugar Bear's work space and the pieces have a nice drawer to live in until I make a bigger board or hang the old one.